Airfield Viewing Guide - RAF Cottesmore
As of 15th December 2011 the airfield at Cottesmore fell silent, with the based Harriers going into storage and later being disposed of, mostly to the US Marines for spares use and a tiny number for UK museums. The station disbanded at the end of March 2012 and became an army base. I will leave this guide up here in its final state for posterity.
General Description
Located North of Cottesmore village, 4 miles West of the A1, half-way between Melton Mowbray and Stamford. RAF Cottesmore is the home of Joint Force Harrier, consisting of 1(F) Squadron plus 800 Naval Air Squadron with their Harrier GR.9s and T.12s. 3 Squadron have become a Typhoon unit and moved to RAF Coningsby; IV(AC) Squadron have been renumbered as 4(R) Squadron and moved to Wittering as the OCU. Until early 1999 Cottesmore was the home to the Tri-National Tornado Training Establishment (TTTE) but with its closure became an exclusively-Harrier station. The RAF's other major Harrier station, RAF Wittering, is only about 20 minute's drive away to the South-East.
The last Harrier to land at RAF Cottesmore - ZG506, 15th December 2010
| ICAO | Telephone | Web links |
|---|---|---|
| EGXJ | 01572 812241 | RAF Cottesmore |
| IV(AC) Squadron Association | ||
| Thames Valley & Chiltern Air Ambulance | ||
| Aerial view |
| Frequencies | |
|---|---|
| Frequency | Description |
| 122.100 | Tower |
| 130.200 | Zone |
| 231.725 | Zone |
| 231.775 | Air to air (1(F) Squadron) |
| 233.275 | Air to Air (IV(R) Squadron) |
| 241.000 | Air to air (NSW) |
| 242.450 | Air to air (1(F) Squadron) |
| 247.025 | Air to air (1(F) Squadron) |
| 262.625 | ATIS |
| 275.300 | Operations |
| 277.825 | Air to air (IV(R) Squadron) |
| 278.450 | Departures |
| 281.750 | Air to air (IV(R) Squadron) |
| 281.900 | Approach |
| 281.950 | Operations |
| 308.825 | Ground |
| 315.625 | Air to air (NSW) |
| 315.750 | Air to air (IV(R) Squadron) |
| 336.200 | Operations (NSW) |
| 338.250 | PAR |
| 339.325 | PAR secondary |
| 339.975 | Air to air (NSW) |
| 362.425 | Air to air (1(F) Squadron) |
| 369.350 | Tower |
| 378.350 | Air to Air (IV(R) Squadron) |
| 379.075 | Director |
| 386.725 | Air to air (IV(R) Squadron) |
What you can expect to see
Harriers of the resident squadrons plus a limited range of visitors. I've seen Hawks, Jetstreams and USAF C-130s arriving or bashing about the circuit while Harriers kept the noise level interesting. Maybe I've been lucky but I've never had to wait more than 40 minutes or so before something arrived to do some circuits. In recent years however the Harrier force's workload overseas has meant things are quieter here than they used to be. With the drawdown of the Harrier, though, currently it seems the station is actually busier than normal with everybody trying to get some hours in!
Flying runs throughout the day but tends to taper off around 16:00 local (or just before dark); in the past there has been some night time activity on a fairly regular basis, it is reported that there will no longer be any night flying, nor flying on Fridays (a few Friday movements have occurred however, though these are very limited and it is not worth your while turning up on the off chance there will be some). Operations are currently only scheduled to continue until mid December 2010.
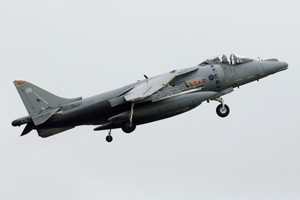
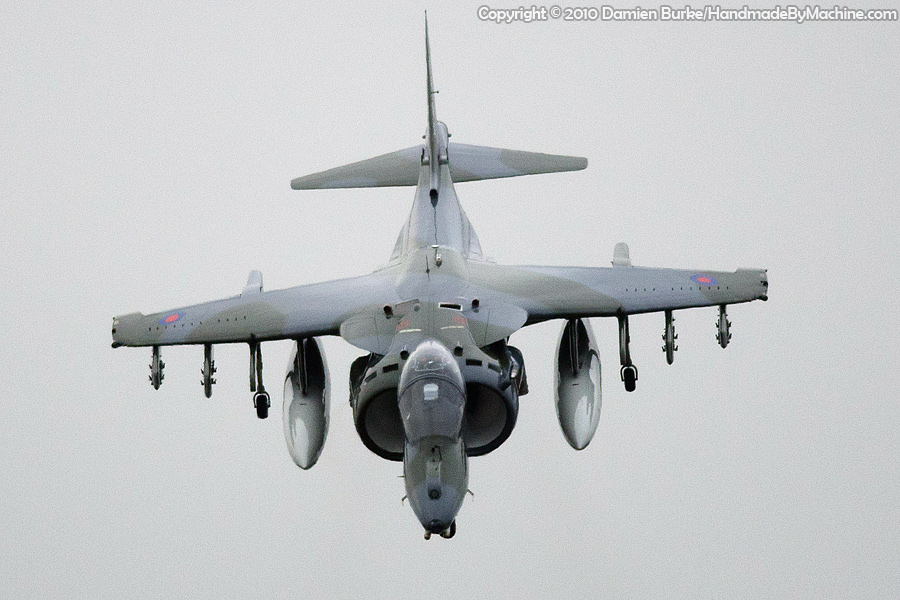
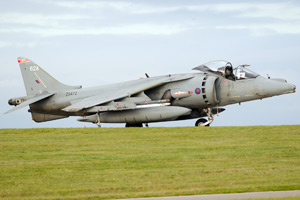
Harrier GR.9 taking off (taken from point A, 790mm); author |
Assuming you're coming from the A1, take the B668 exit for Stretton, handily signposted to RAF Cottesmore. Head towards the village of Greetham and soon you'll come to a cross junction with a signpost for a golf course on the left and Thistleton on the right. Take the right turn-off and follow this increasingly narrow road (Hooby Lane) until you see the fence of the airfield. The road turns around in a hairpin bend here, and there is plenty of space to park off the road right by the airfield fence (A). This is the most popular place to spot at Cottesmore; aircraft landing on runway 22 will appear in the distance to your right and those taking off from 04 will just about begin to clear the fence in front of you here. |
| If 22 is in use, the south-side taxiway is usually used by departing aircraft which means they'll taxi past you only about 50 feet away - this used to be great for photos and serial spotting too, from the field corner to your right (there are two holes in the hedge to gain access - use the one on the right). Unfortunately a new tie-down facility was built here in 2001 which obstructs a great deal of the view. Operations are based out of the main ramp, far to your left and out of sight - Harriers landing on runway 04 will almost never come up as far as point A, and those landing on 22 will flash past on the runway before taxiing off the runway at Bravo or Charlie taxiways, again out of sight to your left. From where you parked it's also just a short walk to your left to the hedge across which you can see the visiting aircraft ramp - no good for photos but usually okay for serials (any that are obscured from here can usually be made out by going down the road away from the station). Unfortunately the visiting aircraft section has been closed since November 2010 so you are not likely to see any visiting aircraft using this area! |
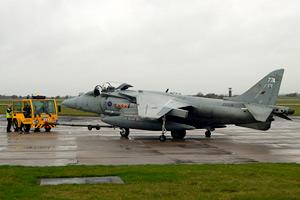
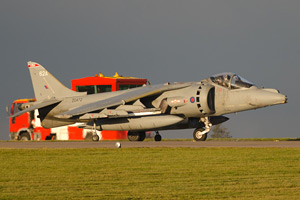
Harrier GR.9 being towed from the engine running facility (taken near point A, 75mm); author |
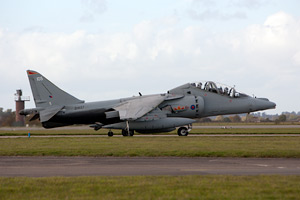
Harrier T.12 taxiing (taken from point B, 260mm); author |
Aircraft joining the circuit will often fly right over your head here, and they often arrive in formation as well - so if you see a singleton Harrier come in, keep your eyes open for a pair following him, or even three more. The sun's position never gets particularly bothersome here though later in the day photography towards the 04 runway end will get difficult; however approaching aircraft are beautifully lit, you can see right down their intakes with no difficulty at all! The fence stops just to your right which means you can step down into the bordering field and get shots of anything on the runway if you're quick - you only have a few seconds of them being visible between the tie-down building and the chainlink fences to your left. Don't walk on the farmer's crops and keep to the edge of the field! A walk past the engine running facility is worthwhile, as it will bring you along the boundary fence to clearer viewing (e.g. point B). You can also keep walking along the fenceline here - an unofficial footpath - to get to one of the best viewing opportunities in the country. |
| The Viking Way footpath crosses the land at the eastern end of the airfield, and the farmer who owns the land here is normally happy for people to leave the footpath and get right up to the airfield fence (C and surrounding areas - possibly one of the closest spots to any runway in the UK and therefore excellent for photos) but keep him happy and don't go through his crops and please don't drop any litter; also don't hang around directly under the approach (i.e. the area with the lights in it), it's potentially dangerous. When aircraft are landing on 22 the freedom you have for moving around the runway end here is absolutely unparalleled, so it is fantastic for photos of aircraft on finals. Even a small lens will do you here - just DON'T stand directly under the approach all day - they can get very low over that fence! Ear protection is also a very good idea here, Harriers often slow right down and carry out a very noisy landing only feet away from you. |

Harrier GR.9s taxiing on eastern taxiway to runway 22 (taken from near point C, 780mm); author |
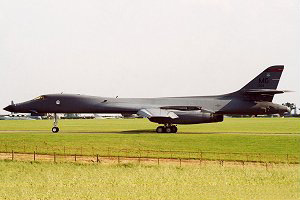
RIAT visitor - B-1B holding (taken from near point E); author |
A walk further up the footpath to the hedgerow at the field boundary (E) can give you a clear shot down onto the taxiway here; you can also get shots from right up by the fence of course but the lie of the land increasingly puts the taxiway above you as you go further round the fence. If there is absolutely no room to park at point A, or along New Road, then you may be better off parking in Thistleton village and walking along the Viking Way from that end (it's about a 10-15 minute walk from the yard where the Viking Way path sign is to the station perimeter). Walking further back towards Thistleton can yield good photos of any Harriers curving round on a tight circuit, but that's an extremely rare occurrence nowadays. |
| For alternative parking and viewing, back to the car and continue on the road that goes east from point A. You'll pass the Viking Way footpath entry (room for a couple of cars to park here), keep going and you'll see a Give Way sign, and the road curves to the left (ignore the turning on the right). Just round the curve is the place to give way, turn left here to go towards Thistleton. You'll soon see the approach lights sticking up on either side of the road; the verges here are fairly big but you may get moved on if you park on them - they're designated as a roadside nature reserve. Luckily there are a few field entrances around here, in particular a big open one on the Eastern side of the road just South of the approach lights (F). The farmer who owns this field is fairly happy with people being here as long as his access is not restricted and his crops are not harmed; accordingly, park either on the dead corner of the field to the left of the entrance, or park to the side of the track that goes up the hill here (this is generally only possible in summer as the track gets so muddy at other times of year). Tractors use it regularly so keep off to the side as much as possible. Unfortunately as you're at the bottom of the hill at this spot and still a fair distance away from the runway, good photos can be a bit hit and miss depending on how low an approaching aircraft comes in. For better angles you may want to walk along the track at the side of the field, it dips down at first but soon rises up; good for larger types but Harriers are often too far away here. |
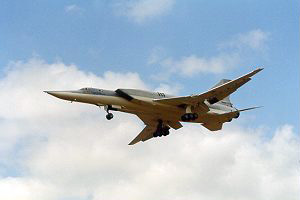
RIAT visitor - Backfire on approach (taken from the track east of point F); author |
Harrier GR.9 on approach (taken from near point G); author |
As you can see from the map, the Viking Way also comes out by the road here and it's a bit of a shorter walk to get to the runway end here than it is from the parking at point A. However, staying away from the footpath, let's go to the next possible spot, for that over-the-head experience - the approach lights themselves. If you want to walk to the approach lights from where you are, do so on the verge outside the field - don't go through the field itself or the farmer won't be impressed. There's a gate in the verge on the right here (G) and room for several vehicles to park if the gate is open, but it may not be wise from a safety point of view to park here for any length of time. Further up the road there's another field entrance with just about enough room for a car or two to park off the road and get another angle on approaching aircraft - useful later in the day when the sun would make things difficult on the other side of the approach. |
| Continuing our tour, get back on the road towards Thistleton. Go through the village (unless, of course, you're parking up to walk down the Viking Way towards point E) and there will be a left turn signposted for Market Overton. Take this, and just round the corner you'll see some farm buildings with a tree-lined lane just before - go down this. You can see the radar tower in the distance but though this lane ends at a crash gate (H), the land here is much lower than the airfield, so all you'll see is the sloping grass when you get there. Aircraft in the circuit fly over this lane but they do so rather high so photography won't be very good; I suspect getting serials will be difficult as well. The Harriers do occasionally practice near-vertical landings and when they do this they can be pretty low and near to you here when they curve round for another go. For the occasional air displays held here (that means Families Days now that RIAT is back to being at Fairford), this can be a good spot for action photos of aircraft displaying but it is hit and miss. Overall, this spot is really pretty useless so you won't miss much by not bothering coming down this lane. Back down the lane to the road, turn left and go towards Market Overton village. Once in the village there will be a left turn signposted for Cottesmore; take this. Just before you leave the village, the road curves to the right while a no-through road continues on ahead - this leads to a crash gate with no view of the airfield whatsoever, but just before then there is a track leading into a field to the south and plenty of space to park on the grass by the gate (I). Go over the stile and you're on what used to be part of the airfield. It is very distant from the runway, so no use on most days, but can be a good spot during Families Day displays or flypasts as it is basically opposite the hangars where the crowd would be. |
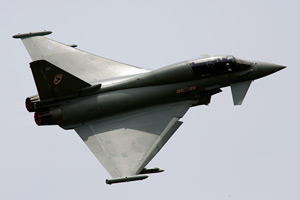
Typhoon displaying (taken from point I, 750mm); author |
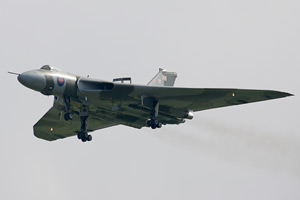
Vulcan on final approach (taken from near point K, 400mm); author |
Back out to the main road and turn left, keep going and you'll soon see a number of field entrances (e.g. J) which could possibly offer a brief parking opportunity if you see any Harriers using the 'strip' - the short 09/27 runway. They use it quite a lot, but the actual viewing opportunities from this roadside are pretty hit and miss, so continue on past the right turn signposted for Barrow (bus shelter on the right side of the road here). Not long after this point you'll find a large field entrance on the left (K) with plenty of room to park. From here you can read off serials of aircraft on the main ramp, but it's hopeless for photography, being too distant (you'd need a 4000mm lens to frame a single Harrier, and the heat haze off the ramp would make for a poor picture even if you had a lens like that!). For aircraft on approach it is a bit better, but they are pretty high and distant here and really only larger types would make decent photos - you're also north of the approach so the sun would be in your face for most of the day. |
| You may be tempted to continue down the track towards the airfield - please do not! The farmer here would prefer people to stay here and not continue past the gates - the view does not get much better down there anyway, as the land gets lower. For a better angle on aircraft on approach to 04, continue a little further south on the road - there's a wide flat verge on the left, and a small layby on the right (L) which can take several cars. Anywhere between this layby and the turn-off for Cottesmore village gives good clear views of approaching aircraft, though they are still a little high for good photos and you will really need a long lens (400mm+). |
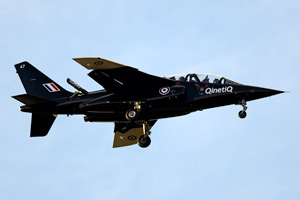
Alpha Jet on final approach (taken from near point L, 800mm); author |
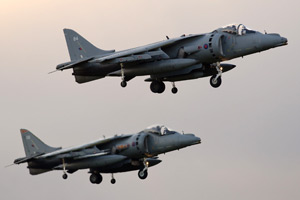
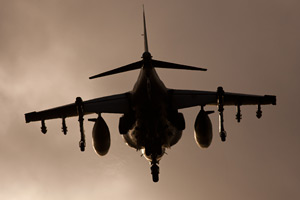
Harrier GR.9s on short final (taken from near point N, 530mm); author |
To get to a spot where they are lower needs considerably more effort; take the left turn signposted for Cottesmore and proceed into the village; turn left at the T junction and then take the first left (Rogues Lane), signposted RAF Cottesmore. The cemetery (M) is worth a visit to pay your respects to the many aircrew buried here. The road is also wider here, offering a good parking place for the next spot, which I would advise you walk to rather than taking your car to... |
| This is because it is down a very muddy and rough lane which is really 4x4 territory if you really want to risk driving down it! It leads up to the airfield perimeter and a crash gate (N) and from here you have a great view of aircraft on finals for runway 04 (big lens required though - 300mm on a 1.3 or 1.5 crop body is really the minimum), or aircraft arriving overhead and breaking into the circuit. Unfortunately the lie of the land is such that any view of aircraft taxiing off the runway end here to return to the main ramp (or coming out to the runway) is partially obscured by the ground. You can get a little bit of extra height by climbing up the heap of earth and broken trees on the edge of the hardstanding here, but it still really isn't high enough and you'll get the bottom of the wheels chopped off in your photos; there's a tiny stretch where the grass doesn't entirely obscure the taxiway but a load of taxiway marker poles crop up there instead. |
Harrier GR.9 taxiing (taken from the earth mound by point N, 450mm); author |
Harrier GR.9 on the runway (taken from the field corner near point N, 1080mm); author |
If you have a larger lens (600mm+), then a walk around the field edge (bring your wellies!) towards the small green garage building to the south-west of the hardstanding will gradually bring you higher up and you'll just about be able to see the runway end clearly along with parts of the taxiway. Shooting from here is really a winter-only proposition, when heat haze is at a minimum, and a tripod or monopod is a good idea too. Of course that means freezing while some distance away from where you left your car by the cemetery... and the opportunities are still not great. Generally life is a great deal easier if runway 22 is in use, and the opportunities at the other end of the airfield are far superior to the 04 end. |
The only other thing worth seeing is the gate guard - return to your car and continue the road towards the station entrance; the Harrier GR.3 gate guard is visible down here (O - ask for photo permission at the guardroom), but it's a dead end for spotting - happily there's enough room to turn the car around at least! Continuing out of Cottesmore you'll be back on the road we started on, going in the opposite direction. Follow this and you'll go through Greetham and be able to get back onto the A1 (right on the roundabout for Southbound, straight over for Northbound).
Other Information
Petrol/diesel is available at the garage in Cottesmore village, there's also a post office/shop in Greetham for basic refreshments - drinks, sandwiches etc.
Foreign visitors may wish to note that the A1 is sometimes signposted as the Great Northern Road.
Station security seem quite happy with spotters at Cottesmore and I've never seen them bother anybody except during RIAT in 2000 when the local police removed cars parked on verges and the MoD police asked people to move away from the runway end near point D (with little success - a USAF B-1B had greater luck in 2001!).
If you're at point A, Harriers making vertical landings sometimes orient themselves to point directly at you, bow, and then rotate to match the runway heading once more. Harriers often make approaches and (very occasionally) landings on the parallel taxiways; there are also two hover pads on the western parallel taxiway (marked with asterisks on the map) on which they practice vertical landings. There are no viewing locations that offer a clear view of the hover pads.
Contributors: author, Gary Parsons, Graeme Carrott, David Tanner, Mike Anderson, Mike Tighe, Mark Lindley, Dave Caris, Tigger, Andrew Lockwood, Andrew Carney, Fighter Control forum.