Airfield Viewing Guide - RAF Brize Norton
General Description
Brize Norton is squeezed in between Brize Norton village and Carterton town, south of the A40, about 22 miles West of Oxford. It is the largest RAF station and is basically the RAF's version of Mildenhall, home to the tanker and air transport fleet.
| ICAO | Telephone | Web links |
|---|---|---|
| EGVN | 01993 842551 | RAF Brize Norton |
| 01993 896342 / 897779 (MCO) | Aerial view |
| Frequencies | |
|---|---|
| Frequency | Description |
| 119.000 | Zone |
| 121.725 | Ground |
| 123.725 | Tower |
| 126.500 | PAR |
| 127.250 | Approach |
| 130.075 | Operations |
| 133.150 | Approach |
| 133.750 | Director |
| 259.000 | ATIS |
| 264.775 | Director |
| 339.850 | PAR |
| 379.750 | Tower |
| 386.825 | Operations |
| 389.575 | Radar |
| 396.850 | Ground |
What you can expect to see
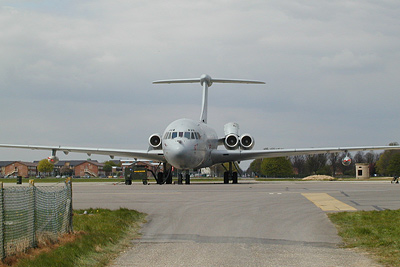
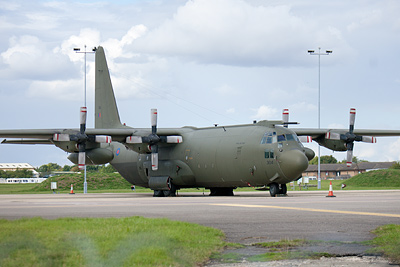
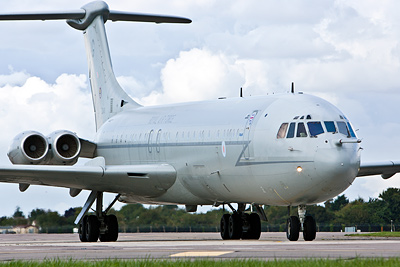
A400M Atlases of LXX Squadron, Voyagers of 10 and 101 Squadrons, C-17 Globemasters of 99 Squadron, Hercules of XXIV, 30 and 47 Squadrons. It will be a strange day if you do not see several aircraft parked up and at least four or five movements. Common visitors are transport, communications and VIP aircraft from other countries, and civilian charter airliners plus the odd fly-through from Boscombe-based types.
Viewing
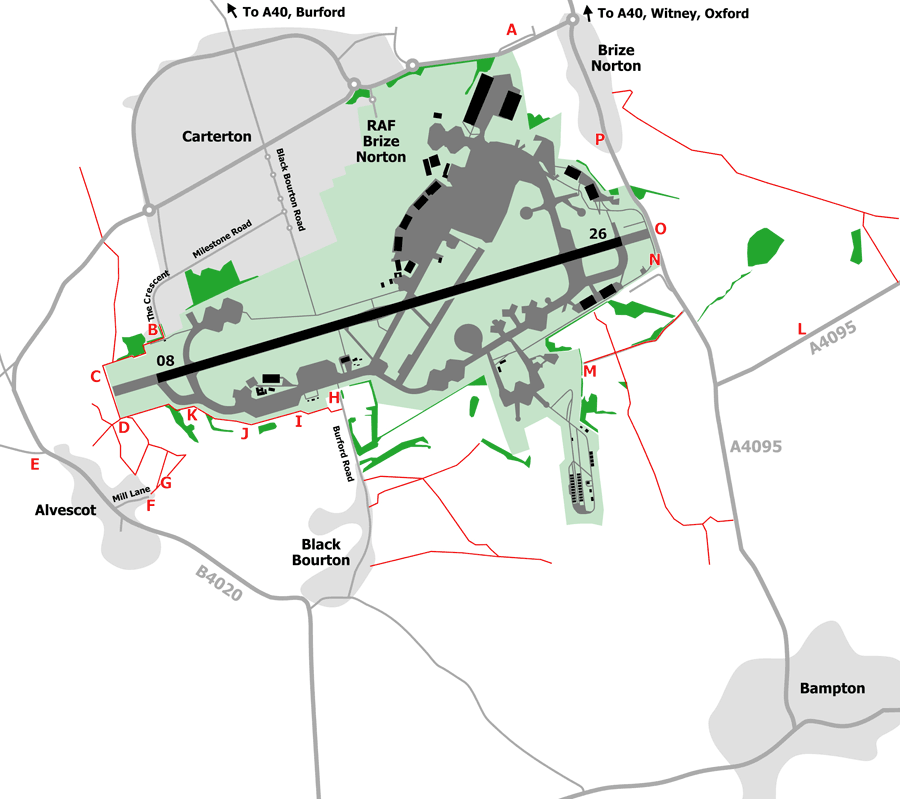
Hercules on short final
(taken from between points C and D, 40mm lens); author
Presuming you are coming from the A40, come off onto the B4477 (signposted for RAF Brize Norton) and follow this road. You soon enter Brize Norton village, straight over the first roundabout you see (generally follow signs for Carterton, not Curbridge). You'll come to another roundabout where you have a choice of going straight over or turning right. Turn right and shortly you'll see a massive hangar on your left, with a turn-off on your right. Take this right and you'll see a gated section of road immediately on your left, which runs parallel to the main road. You can park here (A) and cross the road for a walk along the perimeter; useless for photography but fine for getting serials of anything parked on the dispersals, in front of that massive hangar (known as the Base Hangar) and if you're lucky, in front of the main terminal area.

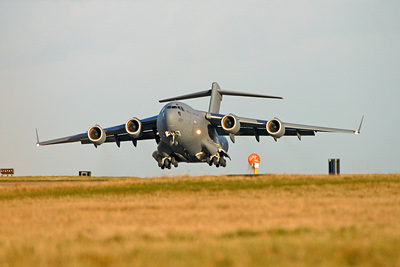
Voyager on final approach
(taken from point E, 150mm lens); author
Back in the car and turn right out of the parallel road bit to continue on the road to Carterton. You'll come to a roundabout just past the station entrance - go straight over. Incidentally on the right here is a petrol station with a good shop and toilet - ideal for refreshments and the inevitable calls of nature. Anyway, keep going on this road and you come to a set of traffic lights at a crossroads. Turn left at the lights and you go past some large shops on your left and over a few mini-roundabouts. Look out for a road on your right called Milestone Road; you want to take this turn and continue down Milestone Road right to the end. Before it curves to the left there's a turning on the right but you want to keep going into the dead-end bit. Plenty of room to park by the pavement at the end (B) - just don't block any driveways, and don't continue off the road into the lane in front; there is a wider bit right at the start of the lane where it's okay to park on the right though.
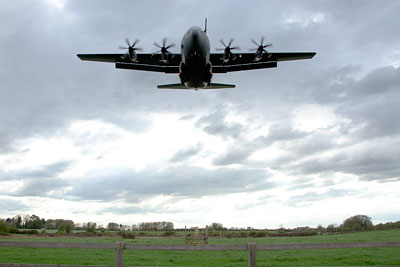
C-17 taking off (taken from just North
of point D, 800mm lens); author
From here you can walk to the perimeter fence in front of you. There's a limited view of the runway from here, but the chainlink fence, a tower and a building make it pretty tricky for photos. No view of the terminal at all. Keep walking to your right; this is the footpath to Black Bourton and goes right round the perimeter. The fence remains high and soon becomes double layer, so unless you have a big ladder forget photos. Thankfully as you turn the corner at the end of the station the fence becomes a single layer affair, much lower, and made of wooden slats with gaps between them. Unfortunately chain link has been used to cover it, so you need a stepladder to see over it for photos (C).
A few feet further on and you're directly at the end of the runway; the fence doesn't get any higher so that stepladder is still handy. Behind you are the approach lights; I don't imagine anybody would be particularly bothered if you stood in the field behind you for a clear shot of anything landing on 08, though to get into the field either means climbing the wooden fence here or going through at the gate you've already walked past. Continue walking and on the small bridge over the stream taller people can just about take pictures without the need of a stepladder; you can also stand on the railings to see over the fence here, which is particularly handy for side-on views of anything taxiing onto the runway here from the southern taxiway. Continue down to the next corner and you can get decent side-on views of arrivals too (D; departures are usually a little high). Now, you could continue on foot right along to point H but for the sake of the less fit among you, let's see how to cut down on some of the walking. Back to the car!
Drive back up Milestone Road, but take the first left. Up this road and turn left at the end, then straight over the roundabout right in front of you. You're now on the B4477; you'll soon see a fork in the road, keep left. If you can find a place to park along here (e.g. at the side of the turning that goes off to the right - E), then you might have some luck with anything on approach to 08 or taking off from 26 but given the far superior spot we've just been to I really don't see the point.
Good old days - VC-10 departing (taken from point G, 600mm lens); author
Continue on this road into Alvescot village and take the turn on the left signposted for the Church. Park outside the churchyard (F). A brief walk through the churchyard will lead you to a gate out towards the fields - this can be muddy so wellies advisable. There is a public footpath running across this field (G), running towards the farmhouse, and a lens of around 400mm or larger can get you nice nearly side-on shots of large aircraft taking off from 26. However the cows in this field make it a pain to hang around in and it's only good for 26 departures.
Good old days - VC-10 (taken from point H); author
Back to the car and drive back out to the main road and turn left. You'll soon see a left turn signposted for Black Bourton. Take this turn. You'll then see another sharp left signposted 'Black Bourton village only'. Take this one too. Drive right to the end (don't go too fast over the hump backed bit!) and you'll come to a crash gate (H); plenty of room nearby to park. From here you have limited views of the South dispersals, where you'll often find at least one Hercules parked up. Not much use for photos though because of obstructions, though you can get lucky sometimes.
So, continuing on foot, walk back and there's a road to your right with a sign warning that only authorised vehicles can continue, with a public footpath sign too. This is an access road for farmers and Thames Water; you can normally get away with driving down and parking at the end, to the side of the sewage works entrance (I), but it's just as easy to walk it. From point I you have a clear view of the dispersal here and pictures can be taken through the high chainlink fence; 100mm lens should do for a full frame Hercules, but angles are limited because of floodlights and ground equipment, and wheels can be obscured by the ground in many positions. Basically it's not much cop for photos unless you want close-ups of noses and tails. Very easy to read off serials though.
Hercules (taken over fence at point J); author
Walk a bit further on, holding your nose past the sewage works, and you get a side-on view of anything parked here (J). A bit further and by a corner of the fence (K) you have a clear view across to the runway - a big ladder (or shooting through the fence) might get you passable shots of anything landing on 08 or departing from 26, but more importantly you can get excellent shots of aircraft taxiing off onto the loop of taxiway here. A small stepladder is recommended for that sort of shot. You can continue walking right round the edge of the station of course, as mentioned earlier.
Good old days - VC-10 taxiing on 'the loop' (taken from point K); author
Anyway, back to the car and drive back down the road. Take a left at the end, follow the road for a bit and take another left at the end again. You'll come into Bampton village. Through the lights, and then turn left (signposted for Brize Norton). Stay on this road for a few minutes and you'll come to a turn for Lew on the right - take this and drive up the hill.
There are a few places along this road where you can pull over (such as the small layby on the left - L - or a field entrance just after that on the right) and it offers an excellent raised viewpoint for a panoramic view of the airfield (though in summer there can be a fair amount of foliage blocking the view) and the approach to 26.
Distance is your enemy here, with around a 500mm lens really being required. Up to 800mm would be useful the nearer the aircraft get to touchdown. The further up the road you go the higher you get but the more distant you are from the approach path and there aren't too many places to stop anyway.
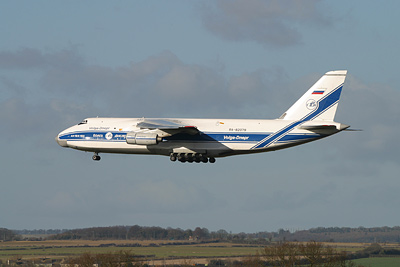
An-124 on final approach
(taken from point L, 360mm lens); author
Drive back down the hill and turn right towards Brize Norton again. - keep straight. Very shortly after this you'll see a small turn-off on your left, with some white railings on either side of the track. Drive along this track past some houses and keep your speed down, because horses use this lane a lot. You'll then come to a stables on your right and the lane continues round to the left. Watch out for cats on the road! The lane soon becomes a muddy track and then just mud (M).
The good old days - Wessexes departing
from helo manouevring area in 2003
(point M, 800mm lens); author
From here you may be able to see any of the airframes held by the movements school and fire section, though nothing is usually visible. Helicopters sometimes operate over here but are generally too distant for photography. Views across the terminal are limited to none but you may be able to pick up a serial you couldn't get elsewhere. All in all though this spot is not much use.
So, back down the lane to the main road. Turn left at the end, and you'll very soon see the entrance to the Viscount Court industrial estate - unfortunately this area is no longer useful for parking as the owners of the industrial estate have now employed the services of a car clamping firm. So continue past and you will go over the old railway bridge (this spot offers a fantastic raised viewpoint for 26 arrivals but you'll have to come back here on foot).
You'll soon come to a pair of gates on the left - Britannia Gate. This used to be a popular place to park despite one of the two gates being a crash gate. Now that Brize is used for the repatriation of fallen service personnel, this area has been tidied up and is the dedicated exit for the corteges that leave here on a far too regular basis. Accordingly this is not a suitable place to park at any more - particularly on a repatriation day! Notification of repatriation dates is posted on this page of the Oxfordshire County Council website. This spot does offer excellent views through the high chainlink fence across to the terminal, and probably your best angle on anything parked by the engine test stand (in front of the two hangars to your North-West).
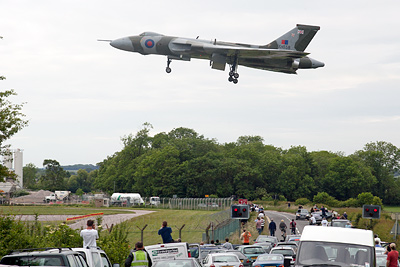
Vulcan on short final (taken
from railway bridge near point N); author
Just a little further along the road is the runway end (O); there's a big expanse of concrete verge on the left, but you cannot park on it as you will be moved on. Two slatted wooden fences block the view directly down the runway unfortunately and using steps here is not advisable for safety reasons - Hercs in particular can come in pretty low.
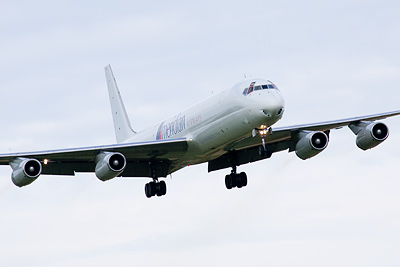
DC-8 on short final (taken from point O); author
On the right-hand side of the road there used to be two fairly large expanses of mud and potholes which were regularly parked on by spotters; however in early 2005 they were knackered by the dumping of loads of earth on top of them followed by the planting of some bollards which make parking impossible. You have to congratulate whoever thought of this, as there will now be dangerously parked vehicles all over the local area, and less chance of aircraft enthusiasts spotting anything dodgy going on (such as the time when several protestors broke into the base right at this spot, chained themselves together and lay down on the runway, causing at least one flight to abort a landing and divert elsewhere).
Because of the traffic lights here you don't need a scanner to know when something is landing on, or departing from, runway 26 - just watch out for the lights going red. This is a fine spot for 26 approach shots, not so good for 08 departures as they're fairly high by this point. Cross the road to the wide verge by the fence and you can get good shots (through the chainlink or over of anything taxiing to/from the terminal too, though the sun makes this tricky from around noon - 300mm lens will suffice easily.
As there is now no parking available in the industrial estate, your next possibility of parking without being moved on or clamped is further up the road in Brize Norton village (e.g. point P - watch out for the vandalism wreaked on the road between the end of runway 26 and the roundabout in the village - the council has plastered it with 'road calming' measures in order to damage as many passing vehicles as possible. No doubt this was from the same idiot who removed the only safe parking for enthusiasts near the runway end. You will pass another crashgate on the way - this is Britannia Gate, which is used when fallen servicemen are returned home from overseas so please do not park here at any time. You will be swiftly moved on if you try it anyway.
Other Information
Petrol available from the garage near the main entrance in Carterton, which also has a big shop and a toilet. Various shops and chippies etc. in Carterton town centre too.
When the Royal International Air Tattoo is on at RAF Fairford, Brize used to act as an overspill, taking any aircraft for which Fairford didn't have room - this is now extremely rare as the size of the show has decreased so much in recent years. If the runway is fouled at Fairford, aircraft may divert to Brize.
Contributors: author, Paul Carr, Tigger, Nick Challoner, David Tanner, Andy Chetwyn, Alan Kilham, Neil Dunridge.